Preparation time
18h 0min
Total time
19h 0min
Portion
1
piece(s)
Level
medium
Ingredients
No Knead Sourdough
- 300 g Sourdough starter, See Tips
- 340 g warm water, See tips
- 100 g spelt flour, wholemeal, Preferably Organic
- 400 g bread flour, aka Baker's flour
- 2 tsp fine sea salt
- 2 tablespoons semolina or polenta, For dusting
Accessories you need
-
 Spatula TM5/TM6
Share your activity
I'm cooking this todayRecipe's preparation
- Starter must be "active" ie room temperature, fed and showing fine bubbles, but not yet bursting though the surface.
Place bowl on top of Thermomix lid and add 300g Starter to a large liddable bowl.
NB: If you need haven't got enough active Starter ready. 8 - 24 hours before commencing Dough Steps, add anywhere from a tablespoon to 100g of your Starter to your large liddable bowl and make up the weight to 300g total with 50/50 bread flour and room temperature water.
See Tips below on water and bowl size.
Stir well with a small spatula or spoon, scrape sides of bowl, cover and leave to "activate" 8 - 24 hrs (depending on how vigourous your initial Starter mix is and what your room temperature is).
See Tips on temperature. - There are LOT's of Tips below....please read and they will help your success!!
- Add tepid (approx 22-25°C) water and Spelt Flour, loosely mix with a spoon. See tips on water
- Add bread/baker's flour and stir well with a large spoon, hands or handle end of a wooden spoon until flour is incorporated.
Scrape Bowl sides down and ensure you’ve got flour from bottom of the bowl. - Cover with lid, plastic film or a shower cap and rest 30 - 60 minutes at room temperature (See tips) to allow water to hydrate the flour.
- Sprinkle salt onto surface of dough and using a wet hand, "squidge" dough between your fingers and "twirl" mix around to distribute salt.
NB: If adding seed, do so at this step. See tips. - Cover and rest 30 minutes at room temperature.
- Remove cover and with a wet hand perform a folding action with the dough in the bowl by;
Slide your hand down the side of the bowl and grab a piece of dough on the side, lift and stretch it out a bit, fold it over on top of the dough mass, turn bowl a quarter turn and repeat x4/5 times.
This is a fold sequence.
Cover and rest at room temperature 30 minutes.
See Tips for keeping time and counting the folds. - Repeat another Fold sequence followed by a 30 minute rest. Repeat x5 times.
By the end you will have a dough that's soft, puffy, coming away easily from the bowl sides and not as sticky as it was when you started.
NB: If your Starter is really active and your dough gets quite soft and puffy after doing 4/5 folds, stop and move to next step. - Use a dough scraper and/or a clean, wet paper towel to clean the sides of the mixing bowl of excess dough bits. Clean bowl sides help when you come to tip it out for baking the next day.
- Cover and place in bottom of fridge overnight to rise, up to a maximum of 48hrs. (I prefer about 12-24 hours)
This slow fridge rise gives a nice tang, improved chew, great taste, feeling of fullness and digestability. - Line the base of a large heavy (cast iron, camp oven, Le Cruset, casserole dish, heavy saucepan/stock pot etc) heatproof (able to withstand 230°C) container with a square of quality baking paper and press out to the sides.
- Remove dough from fridge and generously sprinkle a couple of tablespoons of semolina/polenta around the perimeter (where the dough meets the edge of the bowl).
This helps in dough removal from bowl, gives less chance of dough sticking to cooking pot sides and gives a lovely baked surface. - And using your scraper/spatula to scrape off the bowl sides, tip the dough in one blob into the pot. NB: Don't be too fussed about how it lands, mine usually flips (ie the bowl base ends up the bottom in the pot), however try to do it fairly quckly and smoothly so you don't tear the dough.
- Spray with a little water and sprinkle seeds if desired.
- Place pot into cold oven, on highest possible rack that will let you cover with your lid.
NB: If you don't have a heavy lid, then do what I do and cover the saucepan with a heavy baking tray. Just make sure it does cover all the way around the pot as you want to keep the moisture in at the first stage baking to get good "spring". - Turn oven up to 230C and bake 45 - 60 minutes (In cold kitchens it will need the longer time to heat up the oven!).
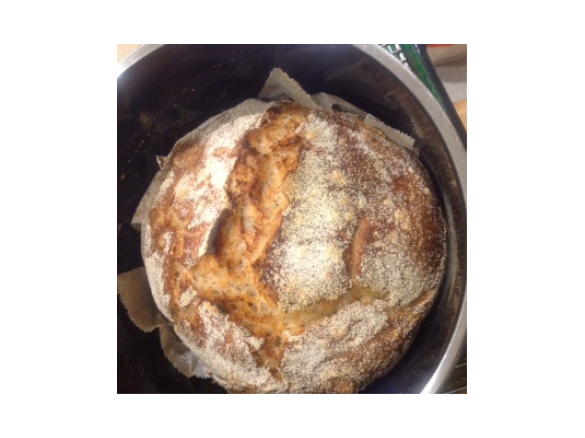
- Remove lid (and go ooh aah at your risen bread!) then bake another 15 - 25 minutes at 180C until browned and crusty.
If you have a thermometer, the internal temperature should be 95°C.
NB: Thers a Bakers saying, “time cooks, temperature browns”. So cook longer if needed! - Tip onto wire rack to cool completely (at least 1hr and preferably 2hrs) to allow moisture to be sealed into the dough before slicing.
This will give you better bread structure and storage. - Store (cut side down) uncovered on kitchen bench or bread board if you can or wrap loosely in a clean tea towel if necessary.
Do NOT refridgerate or wrap in plastic as that destroys your dough structure.
STARTER
PREPARE DOUGH
AUTOLYSE STEP
FINAL DOUGH MIX
FOLDING TO WORK GLUTEN
FRIDGE REST
BAKING - COLD START
COOLING
Tip
Cost Comparison
Purchased loaves are a minimum of $6.00 for a 700g loaf (and some aren't genuine Mother only or true cool, slow rise loaves) vs $2.30 ingredients for just over a 1kg loaf
Scheduling
You'll need to be around and intermitttently involved for mixing folding for just 3 hours before it goes in the fridge for its rest and then there’s the 1 hour bake next day.
And if you need to make up your weight of Starter - add 8 - 24 hours to the beginning.
NB: This works for our weekend consumption....
Friday morning - I take my starter jar from the fridge, remove some for the 300g in my mixing bowl as above and leave the bowl on bench all day to "activate".
NB: Leave a some starter in your mother jar, give it a feed and return to fridge ready for next time.
Friday late afternoon/tea time - I start mixing, autolyse and fold steps whilst having dinner/watching TV and then pop into fridge overnight to rest.
Sometime Saturday or Sunday - I bake.
Mixing Bowl
Rounded sides work best for "folding" and scraping out and glass or plastic are good as you can see the Starter process working if desired.
Water
Should be filtered (eg Pura Tap) or from a pre-boiled and cooled kettle. Do NOT use Spring water (as the salts and pH could retard your delicate Starter).
Water temperature is cooler for recipes containing sourdough vs traditional yeast. About 22-25°C is common for sourdough.
Room Temperature
Sourdoughs prefer a temperature of 22- 25°C when resting so consider the bathroom/laundry floor if you're in a hot environment and placing somewhere warm or wrapping in a towel if your place is chilly.
Timing and counting the autolyse and folds steps
I use my phone and set the timer for 30 minutes at the Autolyse step.
Then, use the timer for each Fold Step as well.
To help with counting the Folds, grab 6 pieces of cutlery, place on bench and every time you do a fold, put a piece of cutlery away!!
Cooking Dish Science
Using heavy materials helps radiate heat better into the dough and that gives a better spring, cook and crust.
Flavourings
Add (after salt is "squidged") 2 TBSN of fennel or cumin seeds, or 1/2 cup pecans or toasted sesame or pepita seeds.
Baking Multiple Loaves
If you've several loaves to bake, for the subsequent loaves (ie the pot/oven are already heated). Allow pot to cool a little and then carefully drop dough into pot and work quickly to get into the oven. Cook 35 - 45 minutes at 230°C and the turn down to 180°C as above.
For a Baking Tin Loaf
Scale recipe to 3/4 and bake 40 mins with lid, then 10 mins uncovered.
Inspired by "Henry Herbert's No Knead Sourdough" from wwwh.hobbshousebakery.co.uk
Adelaideans - I can assist with Starter if you are wanting some...call me on 0409 150 729
Your vote and comments are always appreciated!.....Happy Cooking
Thermomix Model
-
 Recipe is created for
TM 5
If you are using a Thermomix® TM6 measuring cup with your Thermomix® TM5:
For cooking (simmering) at temperatures of 95°C or above (200°F), the simmering basket should always be used instead of the TM6 measuring cup, as the TM6 measuring cup fits tightly in the lid. The simmering basket rests loosely on top, is steam-permeable, and also prevents food spatter from the mixing bowl.Please note that the TM5 mixing bowl has a larger capacity than the TM31 (capacity of 2.2 liters instead of 2.0 liters for TM 31). Recipes for the Thermomix TM5 may not be cooked with a Thermomix TM31 for safety reasons without adjusting the quantities. Risk of scalding by spraying of hot liquids: Do not exceed the maximum filling quantity and observe the filling level markings of the mixing bowl!
This recipe was provided to you by a Thermomix ® customer and has not been tested by Vorwerk Thermomix ® or The Mix Australia Pty Ltd and The Mix New Zealand Ltd.
Vorwerk Thermomix ® and The Mix Australia Pty Ltd and The Mix New Zealand Ltd assume no liability, particularly in terms of ingredient quantities used and success of the recipes.
Please observe the safety instructions in the Thermomix ® instruction manual at all times.
Recipe's categories:
Other users also liked
Show me similar recipes by:








Comments
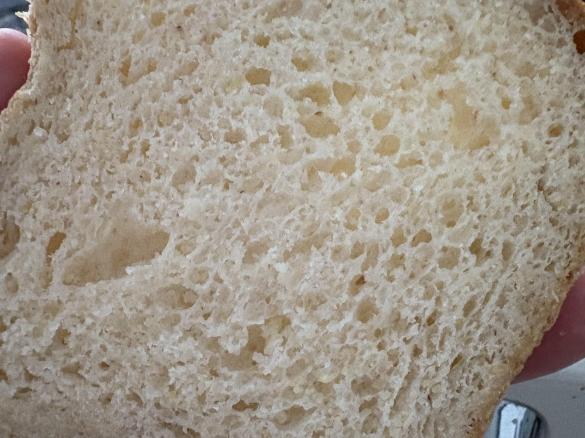
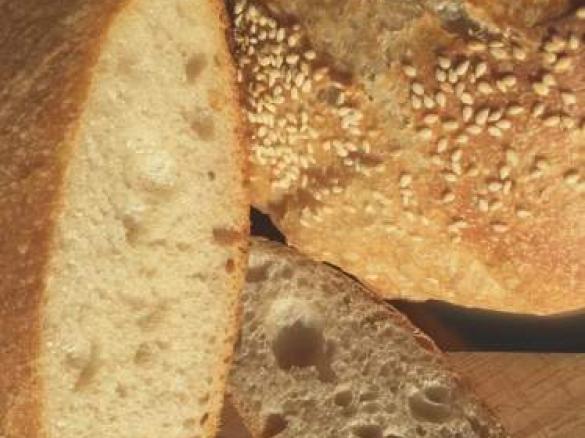
I've been making sourdough bread for a little while now, and decided to give this recipe a go. I followed the instructions exactly and got a great result! It tasted awesome too.