Preparation time
10min
Total time
15h 10min
Portion
12
slice(s)
Level
easy
- TM 5
published: 2017/09/01
changed: 2017/09/01
Ingredients
Sourdough
- 200 grams Sourdough starter
- 200 grams warm water
- 500 grams Flour, Plain, bakers
- 1 heaped teaspoons salt, pink or sea salt
Accessories you need
-
 Spatula TM5/TM6
Share your activity
I'm cooking this todayRecipe's preparation
- 1. feed starter 1/4 cup of plain flour, 1/4 cup of water , stir and allow starter to bubble up an settle. Do this any time of the day you are preparing to bake.
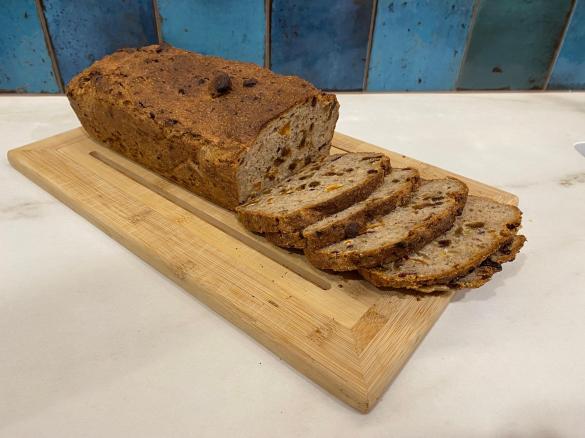
2. place all ingredients in TM bowl and kneed for 2 minutes
3. place in bowl and over with cling wrap (to make humid environment), allow to sit for 8-12 hours. I usually do this the night before baking.
4. lightly hand kneed, just a minute or 2. shape into loaf on tray or place in bread tin. Cover again (to get humid environment) allow to rise again about 3 hours (depends of temp, winter may take longer, summer quicker)
5. preheat oven to 220C, put a small pot of water in oven as it warms up. Once oven reaches 220C put your loaf in the oven for 30min - dont be tempted to take out early. - 1. beg, borrow or steal a robust starter is my recommendation, one atleast 1 year old, unless you are very patient.
2. feed starter 1/4 cup of bakers flour and 1/4 cup water (I always use filtered water), stir, starter should bubble up and settle, over then next 1-3 hours.
3. repeat step 2, every day, twice a day if you are trying to build it up.
4. If not baking for a few days, place started in fridge after feeding and feed once a week. Bring it out atleast 6 hours before you want to make bread again, to become active- fridge sends culture into hibination.
5. If you only have a scrap of starter in jar after making sourdough, feed up slowly, 1 tsp flour, 1 tsp water every few hours until you get atleast 100g in your jar
6. recommend you move your starter to clean jar atleast 6 weekly, to prevent any bad bacteria growing in your lid.
7. If you have too much starter, gift a jar to friend with a link to this recipe.
dough
caring for starter
Tip
slow foods
Thermomix Model
-
 Recipe is created for
TM 5
If you are using a Thermomix® TM6 measuring cup with your Thermomix® TM5:
For cooking (simmering) at temperatures of 95°C or above (200°F), the simmering basket should always be used instead of the TM6 measuring cup, as the TM6 measuring cup fits tightly in the lid. The simmering basket rests loosely on top, is steam-permeable, and also prevents food spatter from the mixing bowl.Please note that the TM5 mixing bowl has a larger capacity than the TM31 (capacity of 2.2 liters instead of 2.0 liters for TM 31). Recipes for the Thermomix TM5 may not be cooked with a Thermomix TM31 for safety reasons without adjusting the quantities. Risk of scalding by spraying of hot liquids: Do not exceed the maximum filling quantity and observe the filling level markings of the mixing bowl!
This recipe was provided to you by a Thermomix ® customer and has not been tested by Vorwerk Thermomix ® or The Mix Australia Pty Ltd and The Mix New Zealand Ltd.
Vorwerk Thermomix ® and The Mix Australia Pty Ltd and The Mix New Zealand Ltd assume no liability, particularly in terms of ingredient quantities used and success of the recipes.
Please observe the safety instructions in the Thermomix ® instruction manual at all times.
Recipe's categories:
Alcohol-free
Children food
Egg free
Lactose free
Non-dairy
Vegetarian
Nut free
Baking
Creative
Easy
Low budget
Natural
Bread
Breakfast
Lunch
Snack
Gift
Other users also liked
Show me similar recipes by:


Comments
Having been very fortunate to have been given a 14 month old starter, I had tried a few recipes since receiving it in June 2020 but when I came across this one, I thought it looked easy so I gave it a go. The loaf was wonderful and after a few slices I cubed the rest of the loaf and drizzled olive oil and vege salt and roasted in the oven for 15 minutes to make croutons. My daughter said they were better croutons than she had ever had.
I am surprised that there are no ratings for this recipe yet. Thanks for the recipe and the additional information on looking after the starter.